
Creating systems that work
Three systems to get us started

Hello darlings!
I hope your summer is as cool as possible, physically, metaphysically, and spiritually!
It’s July! That means that there are approximately 100000 things on my to do list for summer and less than 10 hours to complete all of them (both, exaggerations).
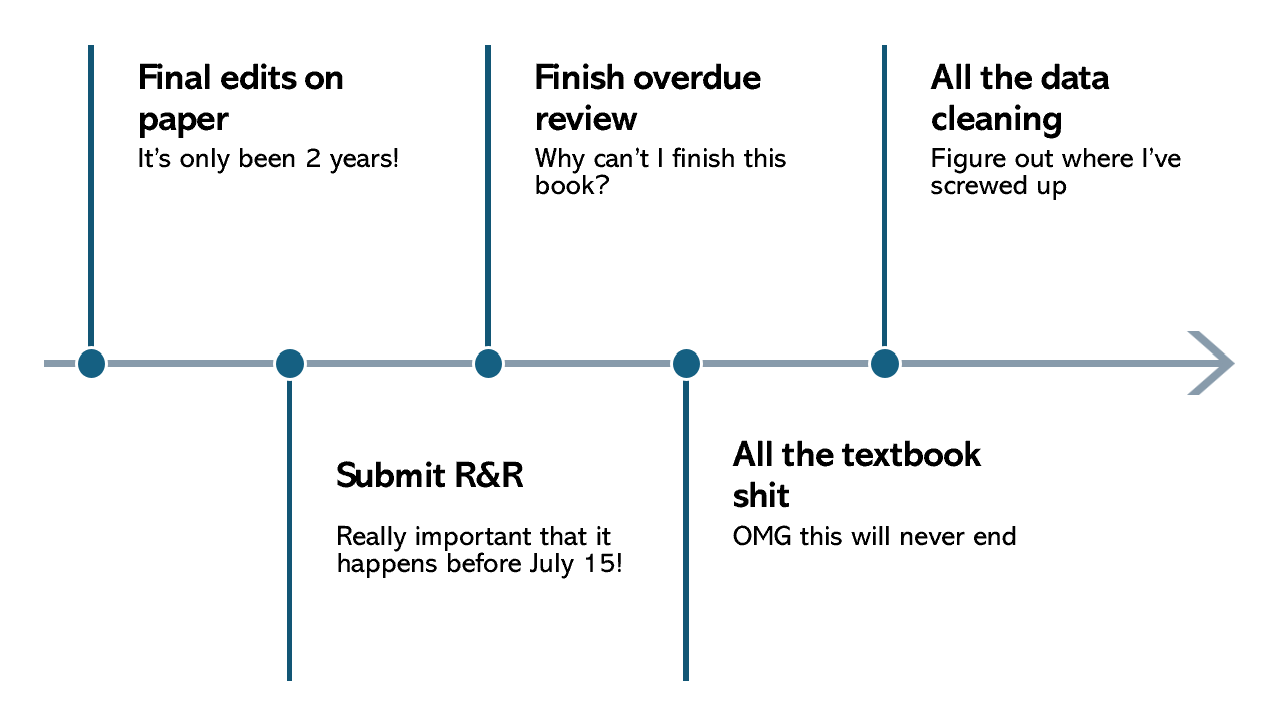
In reality, there are about 8 weeks until September. I want you to go into September feeling like a fucking BADASS. So I’m suggesting (actually, demanding) that you take a little time each week between now and September to set up a system that will allow you to be happy, health, and productive once the semester starts. This post is deeply inspired by Ben Meer! Preorder his book if you want more on this philosophy!
What do I mean by a system set-up?
A system set up is a process where you spend a little time (ideally, one system a week but I know there are overachievers out there! I know you, I see you, I am you) to set up a system that will then help you stay sane, happy, and productive, particularly as the semester gets underway and we all go a little bit wild (and feral, please)
I have been using all kinds of systems (for goal setting, for accountability, for time management, for reviews, for teaching, for working out, for meal planning, for financial planning) for years and I love them! I also love the idea that we should revisit our systems regularly and see if they are working for us!
System set up takes time, so I’d suggest that you do one or two of these a week until the beginning of the semester.
But because I’m me and me is extra extra (all gas, no breaks baby!), I’m providing more than just 8 systems! To be honest, these took me sooooo much time to set up so I’m going to roll them out in stages!
I think that everyone needs to set up these systems, regardless of what your goals for between now and September
- Focus
- Inbox management (built for faculty)
- Syllabus prep
From there, you will have additional systems based on what your goals are right now! If you need to: A) Get your fucking writing done; B) Get your shit together; C) Sail into the semester cool as a cucumber
I’ll send out missives over the next weeks with these additional systems! But let’s start below with a system for focusing, a system for managing your inbox, and a system setting your syllabus up.
If you don’t want to read this long ass email, you can use this google doc where I’ll put all the systems as I finish them.
Let’s finish the summer hella strong!
XOXOX
Mirya
System 1: Focus
Fact: the work we need to do – whatever that work is – requires focused attention. I don’t care if you are writing the next best academic book or prepping your syllabus for the fall or spending time with your kids… you need to fucking focus and stop being distracted by every email or social media post or terrible news article about the state of this goddamn world.
How to get shit done without interruptions by setting up a focus system for yourself.
Step 1: Track your distractions
Start on a hard task. Something you’ve been putting off – revising that paper introduction, producing useable instructions for RAs, figuring out the transition from one idea to another in a paper, picking the final readings for a new course
Work on this hard thing. And watch where your attention goes. What are the first websites you navigate to when you are frustrated or bored? How about the second website? What are the first websites that pop up on your browser when you open it? Look at your phone’s use history and note all the apps that you spend time on during the day. Watch where your fingers go when you stop writing.
Write these websites and apps down!
Step 2: Pick your block session
What are your best times for thinking? What are your best times for hard work?
For me, this is and has always been the first thing in the morning. 7-9am (maybe starting earlier, but this is reliably when I can sit down at the computer). For others, it might be when you get to the office or the block after lunch or 5-7pm. You know what this time is for you. Don’t fuck around and pick some bullshit time. Give this your best.
Step 3: Find a blocker that works for you
I use a combination of StayFocused on my computer and the Forest App on my phone. Other options include a Brick, Opal, Rescuetime, Freedom, or LeechBlock
Step 4: Set up a recurring time block
For your phone and your computer, set up a recurring focus time during your “ideal time” block. This needs to be recurring. DO NOT rely on yourself to start the block every work day. (I would also block email during this time but I’m a psychopattttthhhh)
Don’t wait to turn it on every day – have it set as a recurring focus time block. During that time, block all of the distracting websites and apps that you identified in step 1. Start with 30 minutes. When 7am hits, all the focus apps turn on and you can’t fuck around anymore!!
Step 5: See how it goes and take notes
Where do you go when you can’t go to your easy distractions? Maybe you find other distractions? Cool, add them to your list. Maybe you start doing physical tasks or looking for someone to talk to in the office? Great. Shut your fucking door and put a sign on it ON THE INSIDE of your door that says “sit your ass down and write.” Try different strategies until it sticks — this is the time to sit down and do some fucking WORK.
Step 6: Revisit in 2 weeks.
What’s going right? What’s going wrong? Is the start time of the time block working for you? Are you continuing to find ways to cheat yourself out of your best work and attention? Do you need other, better blockers? Do you need to employ nuclear options on the blockers? Do you need me to come and stand over your shoulder, watching you fail?
Anyway, make adjustments! If it is going well, lengthen your time block to 1 hour, then 90 min, then 2 hours. Give yourself another time block. And another. Leave your phone in a drawer. Throw your computer in the ocean. Write by hand by candlelight. Finally finish that paper.
System 2: Setting up an inbox process that works for you
There are lots of systems out there for managing your email! Most of them are not built for faculty members and how email structures our lives. I am not interesting in how you manage your personal email because that’s your fucking business. But I AM interested in how you manage your professional email. Here’s how I try to manage email (as someone who has worked to get VERY BAD at email because I think it sucks both joy and productivity out of our lives!!). So, maybe a warning that this system might make you much worse at email but the good news about that is that no one gets a job, tenure, or raise for being good at email. Do I think this is a good system? No. But it is way better than most other systems for dealing with the kinds of email that faculty receive
Some other options:
Taking control of your faculty inbox
My systems below assume 1) you do not already have extensive email filtering set up and 2) you are using some normal email system like outlook or gmail. My system also assumes that your goals are (like mine) contradictory: you want to spend as little time on email as possible but also take action on all the emails that are actually important.
Step 1: Start with inbox zero
Start with inbox zero by moving every single thing in your email into a folder called “2025-26 old emails”
ALL OF IT. It is waiting there for you (forever!), but let’s start with nothing!
(I’m going to bet that 95% of these emails are worthless to you)
Step 2: Create folders that make sense to you
What are the main categories of emails you get where you need to read the email and take action or revisit the email later for information. I want you to create a folder for these kinds of emails.
Some of mine are: Action Conferences and associations; Hobby School (this might be your department, I don’t have a department!); Nice things; Nonsense; President and Provost; Travel
Your folders might be different! You can hold off on making folders if these folders don’t make sense to you. You will deal with teaching later! But you can create a teaching folder now if it makes you happy and / or less anxious
What are the main sets of emails you get where you probably never need to look but it an emotional support email and you must have access to it just in case you want to have it? Create a folder called: Waste of time (or, like, info archive)
Option 1: The “you need to earn your way into my inbox” process
This is my process to dramatically reduce the number of emails I need to mentally process while still allowing me to check my email
Step 1: Hide all your email (seriously)
Create a folder called something like “default inbox” or “not today suckers” or “holding pen” and set up a rule that moves every single email into that folder (please just google “set up filter” or “set up rules” and your email service to figure out how to do this). The folder should be a subfolder to another folder so you do not easily see the unread count.
This should mean that zero emails come to your inbox (gasp). Send a test email or wait a little while to see if this works.
Step 2: Figure out who earned a spot on your inbox
Spend 10 minutes looking at your sent emails to identify the people that you actually correspond with regularly. Spend another 5 brainstorming who the coauthors etc are that you haven’t emailed with recently but you’d still want to see their emails quickly. For me, this is exclusively coauthors and RAs and staff in my school.
Step 3: Create a rule for each of those people
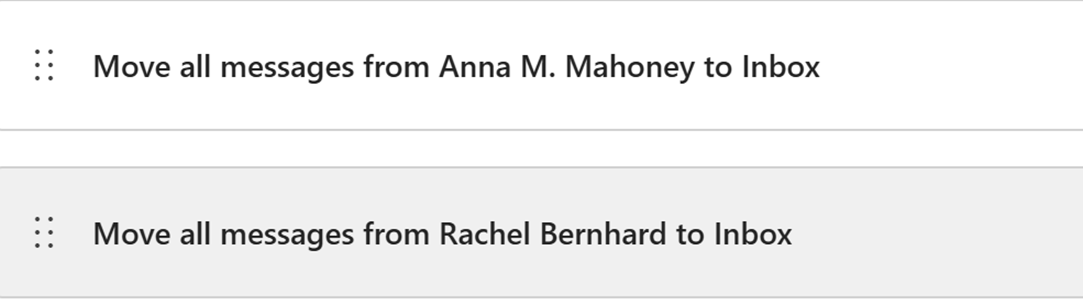
For each of the people identified in Step 2, create a rule that moves their emails from the holding pen into the inbox. You can either create an exception to the default inbox rule or create a second rule that overrides the first. This is what this looks like for me:
Option 2: The “I want to process everything” process
(If steps 1-3 from above make you nervous, just skip them and use your inbox as the sorting folder)
Step 4: Process emails as they come in
For the next month, put a time slot on your calendar called “email management.” TRY really hard to not process emails outside of this time.
During this time slot, consider every email you get (for Option 1 people, this will be everything that comes into your hidden inbox, for everyone else, your regular inbox) and ask yourself the following:
Question 1: Is this an email that you need to have and respond to?
Examples might be: coauthors, RAs, grad students, high level service activities
If yes: Under Option 1, create a rule to move their email to your inbox. Under option 2, do nothing! You will continue to receive emails from this person or entity into your inbox. Yay!
If no: ask:
Question 2: Is this an email that I want to receive at all?
If no, unsubscribe! If you can’t unsubscribe (it is an email from a campus org, etc), then create a rule that automatically moves the email into the “nonsense” folder and marks it as read.
If yes, ask:
Question 3: Is this an email that I need to take action on?
Great. If it will take less than 2 minutes to do the task, do it right now. If it will take more than 2 minutes, move it to the “action” folder. This will be the second place you look for email work after your inbox. If a particular person or entity only (/mostly) sends you an “action” email, go ahead and create a rule that moves emails from them to the action folder.
Question 4: Is this an email that I’ll want to look at again later, but requires no action right now?
(examples include emails from associations, journal TOCs, Paper picnic, centers that you care about, etc)
If yes, create a rule that moves emails from that entity into the relevant folder (i.e., all APSA emails go into the Conferences and Journals folder). If you are brutal like I am, those emails are also marked as read so I will choose to read them on my time, rather than when my little magpie eye sees that new treasures have come in.
Some misc decisions / thoughts:
Sometimes emails come from important people and you want to save them all in one place. Maybe that’s your chair, your dean, your provost, your president. Create rules to automatically move their emails to the relevant folder. If you have a dean or a provost or whatever that sends really ridiculous emails that make you really mad, you should mark them as read and just not read them unless it is necessary.
Generally, I only use rules for senders who send me at least 1x a month.
Sometimes emails come in that are nice! A thank you from a student, a nice note from a colleague, etc. Save those in the nice things folder. Go and look through it when you are having a bad day.
Sometimes junk comes in! Unsubscribe or archive or whatever. Don’t let it get you down.
Step 5: Let it simmer!
Do this for 2 weeks. Keep processing emails until you have no more emails to process during your time slot. There will be a handful of ¯\_(ツ)_/¯ emails that come in during that time where you can decide, eh leave it in the inbox or holding pen and I’ll deal with it, or yes this is worth creating a rule about. If you use the “earn my way in” option, this will also mean regularly creating rules for people who you missed in Step 2.
Step 6: Set up time in weeks 3 and 4 of the semester to do it again!
It is relatively easy for us to do this now because the volume of email is much lower over the summer! But we know that the semester is going to be different. So right now – put email processing on your schedule 2 or 3 times a day in weeks 3 and 4 of the semester. Once you start processing emails then, you may see:
You need a teaching folder where you automatically move all emails relating to class and process them 1x a day? Or maybe you just treat them as you do other emails – if you can answer it in 2 minutes, you do. If not, it goes into the action folder and is addressed in the order received and/or annoyingness
You need to figure out how to handle service requests that are urgent but not important. Maybe they need their own folder that you process once a day? Maybe you will realize that most of them are not actually urgent. Maybe pigs will fly.
System 3: Setting up your semester
Every semester, we faculty have to set up our syllabi and most of us act like we are baby giraffes walking for the first time. This system is designed for you to use before you fill any content into your syllabus but still to get you ready for the semester.

Let’s start with a blank document. I know – it is so so tempting to just start with the syllabus from the last time you taught this class (if relevant) but please start with a blank document. It will be easier to not fuck up and list the wrong years or dates or policies!
Take that blank document and paste in the title of the class*, the semester, the year, and your information at the top. Boom. Syllabus activated. (*If you don’t know this, use the next step to look it up!)
Next, open up another blank document, title it “The semester system” and paste this system set up into it. Make edits to that document as you, including adding links to the things you find below! You can cut out my rambling! You can delete my precious little words! You can replace them with your own!
Step 1: Find the relevant dates for your class
To organize your semester, you need to know the following:
When (days and times) does your class meet?
What is the first day of your class?
What is the last day of your class?
When is your class final?
What holidays occur during the semester that may be relevant to your class schedule?
Next, let’s find out when your class meets! Maybe you know! Amazing. Maybe not. Also amazing. If you don’t know, go look yourself up in whatever system (class schedule, LMS, etc) that will tell you. If you need to look it up, put the location of that information into The Semester System file that you just created.
Once you know when your class meets, put that information on your syllabus!
When does the semester start and end? To find out, access your university’s academic calendar. While you are there, copy the link to the academic calendar and paste it into The Semester System file. Use this information to add your class to your planner or work calendar or whatever system you use.
What are relevant holidays / dates off teaching? The first step here is to use your university’s academic calendar to identify dates when the university is closed. Put those on your own planning / calendar and note them on your syllabus – you’ll come back to this later! Put a star next to any date that direct impacts your classes (i.e., your class won’t meet) but keep the rest in the document – you may want to remember nearby holidays when you schedule exams, etc!
What are other holidays and dates that aren’t on the official calendar but might be relevant to your students! This might include religious holidays, big sporting events, local traditions (hello, I taught in New Orleans for years and Mardi Gras was definitely relevant to the semester!), etc. Search for when those are and note them (ideally, chronologically) alongside the official holidays. You may want to note in your Semester System doc what you searched for so that future you will have a shortcut.
When is your final exam? At most universities, this will be a specific date assigned to your class. Go find it. Put the date on your syllabus. If it isn’t available yet, put “Final exam: TBD” and add a reminder to look for the final exam time the week before the semester starts to your planner or calendar.
When are you traveling? Look up dates for conferences, workshops, and talks that you have already agreed to attend or would like to attend. Add those to the list of dates. Whew, okay. What else have I forgotten? Major life events that will require planning on your part (i.e., a santa-themed anniversary regatta doesn’t just come together overnight!)? Travel you know you have already committed to? Etc etc.
Life tip: make sure you’ve put all these dates into your planner or onto your calendar so you aren’t surprised when they come up!
Step 2: Generate a syllabus outline
Next, look at one of your past syllabi (it doesn’t matter which one!) and copy over the categories into your document. This might include:
Course description
Course objectives
University policies
Class policies
Grading scale
Assignments
Materials
Course Schedule
(Once you are done with this, copy it into your Syllabus system document!)
Step 3: Fill in the boilerplates
Now we are going to fill in the basic information that we are required to have on the syllabus. To do this, please open the most recent version of this class that you’ve taught (if you have taught it before) or a recent syllabus.
Common syllabus content from your university / school / department: What is included in the template from the university / other units? Google/search your email and find the updated version. Copy it into your syllabus under university policies.
Learning objectives, course descriptions: If you have previously taught this course and you are basically satisfied with these, copy them over. If not, you might leave this blank or you could pull over an example from another course. Never taught before! Woah, okay. Ask a colleague or mentor for their syllabi to get started here.
Class policies, grading scale: Copy your most recent versions over. If you have things like appointment sign up links, highlight these or drop a comment so you know to come back later to update.
Step 4: Create your schedule
Generate the outline: Use this generic syllabus generator to generate a list of dates that your class will meet, using the start and end dates you looked up before
Mark out days out: Use the list of dates you generated in step 3 to mark out dates that your class won’t meet for holidays or conference travel. Go ahead and write “No class: university holiday” or whatever on those dates so you don’t schedule anything!
Gray out ‘warning’ days: Use the list of dates you generated to gray out dates that would be bad fits for exams, paper deadlines, etc. For example, you might not want to schedule an exam the morning after the big football game on campus and you definitely don’t want to have a paper due the day you come back from a conference.
Step 5: Leave it alone!
Okay, now you have the outline of the syllabus! You can leave it alone! Or maybe it has inspired you to try to figure out when a family trip will be / if you are going to go to a conference / whether you can say yes to yet one more thing during the semester. You will actually fill in the sustenance of the semester at a later date! Plus now you have your Syllabus System file that will help you do this quickly again next semester.